
Our smartphones are super important to us, and we use them for our daily life purposes. The Samsung Galaxy S20 is an amazing phone with lots of incredible features and a nice screen. But what happens when your screen breaks or cracks? It can be a big problem, and fixing it can cost a lot of money. But don’t worry; this guide lets you quickly improve your Samsung Galaxy S20 screen without spending too much money.
In this post, we can give you a step-by-step guide on replacing a Samsung Galaxy S20 screen, a list of the tools you’ll need, tips to keep it in theory, and precautions for installation and to avoid further damage. Whether you’re a DIY enthusiast or just want to put some money down, this guide will help you get your Samsung Galaxy S20 back to authentic form instantly!
Assessing the Damage:
Before exploring the process of replacing your Samsung Galaxy S20 screen, it is crucial to assess the damage and identify the extent of the screen damage. This step will help you determine the appropriate course of action and understand the level of complexity involved in the screen replacement process.
- Look for any visible cracks, shattered glass, or discoloration.
- Turn on your device and check for any functionality issues.
- Try using different phone features that heavily rely on the touchscreen,
- Test the phone’s proximity sensor, ambient light sensor, and other functionalities to ensure they work properly.
By thoroughly assessing the damage and understanding its extent, you will be better equipped to proceed with confidence and make informed decisions throughout the screen replacement process.
Tools and Materials Needed:
Before you start the Samsung Galaxy S20 screen replacement process, it is essential to gather all the necessary tools and materials. This will ensure a smooth and successful replacement. Here is a detailed list of the tools required for the screen replacement:

- Replacement screen
- Screwdriver set
- Plastic prying tools
- Tweezers
- Heat gun or hairdryer
- Suction cup
- Adhesive strips or adhesive glue
- Cleaning materials such as Isopropyl alcohol (90% or higher)
- Spudgers
- opening picks
Safety Precautions:
Replacement of your favorite Samsung Galaxy S22 is a sensitive procedure so you have to follow these precautions before starting the screen replacement.
- Power off the device and disconnect any power source to avoid any electrical damage.
- Ensure you have a clean and organized workspace to prevent losing small components.
- Use proper tools and follow a detailed guide to avoid damaging the device.
- Wear heat-resistant gloves to protect your hands during the repair process.
- Keep track of screws and components to ensure proper reassembly.
- If you want to reuse the display panel, apply ample heat and carefully handle it.
- Double-check all connections before reassembling the device.
- If unsure, seek professional help or guidance from a technician.
Step-by-step instructions:
Replacing the screen of your Samsung Galaxy S20 may appear challenging, but with the correct guidance and clear instructions, it is achievable to do it yourself. This comprehensive guide will walk you through all the necessary steps to replace the screen on your Samsung Galaxy S20.
Step 1: Heat the Bottom Edge:

- First of all, power off your Samsung Galaxy S20 and remove the SIM tray.
- Heat the back cover’s bottom edge with the help of a heat gun or hair dryer at a medium heat setting for two minutes.
- Do not overheat, as the display and battery of your smartphone are susceptible to heat damage.
- Next, check the bottom edge to see if the adhesive has become soft; if not, then keep heating till it becomes loose.
Step 2: Smartphone Disassembly

- Place the suction pump at the bottom of your smartphone and then apply slowly to create suction between the screen and the frame.
- Apply gradual suction to create more space between screen and frame by loosening the adhesives.
- Now use a plastic opening pick into the gap between them.
- Don’t apply much pressure on the opening pick as it can damage the back cover glass or internal components.
- Sometimes the adhesives do no loose easily then apply heat again.
Step 3: Adhesive Loosening:

- In the next step move the opening pick along the bottom edge of your phone to loose the adhesive gradually.
- Avoid cutting any adhesive near the curved corners of Samsung Galaxy S20 to prevent potential damage during separation.
- Once you have created a space between the screen and the frame then leave the opening pick between them to prevent adhesives from resealing. It will help in easier removal of the screen assembly.
Step 4: Heat the Left Edge:

- In this step heat an iOpener and apply this heated iOpener on the left edge of the back cover of your mobile. You can also use a heat gun or a hairdryer for this purpose.
- Avoid overheating to prevent any damage. Heat the left edge for almost 2 minutes until the adhesive has become loose.
Step 5: Separate the left Edge Adhesive:

- Now apply a suction pump at the center of the back cover near the left edge.
- A strong suction will create a gap between the frame and the back cover.
- After that insert an opening pick between the back cover and the frame of your mobile.
- In case of any tight adhesive at any point you can apply heat again to lose it or you can also use concentrated isopropyl alcohol to make adhesives soft.
- Note that don’t insert the opening pick deep into the gap as it can damage back glass.
Step 6: Gentle Separation

- After inserting the opening beneath the edge, move the pick downward and slide it further to detach the adhesive. It will ensure the separation of glass from the frame without causing any damage.
- While moving the opening pick always applies low pressure to prevent its bending or breakage.
- Move the opening pick all along the edge and separate the frame from the back cover loosening the adhesive.
Caution:
- Make the opening pick movement very carefully during the opening pick sliding near the volume and power off/on buttons as they are delicate to damage.
- When the cover gets separated from the screen, leave the opening pick between them to prevent adhesive from resealing.
Step 7: Heat the Right Edge

- In this step repeat the process as you have done in the previous step like heat up the iOpener, heat gun or hair dryer at medium heat setting. Never make them overheated otherwise you will damage your smartphone battery or display.
- Apply the heated iOpener at the center of the back cover near the right edge to lose the adhesives for 2 minutes.
Step 8: Separate the Right Edge Attachment:

- When the adhesives become soft then apply a suction pump on the back cover near the right edge center and apply a strong and steady pressure.
- The pressure will create a space between the back cover and the frame.
- Insert an opening pick between frame and back cover.
- Tilt the opening pick downward as it can be inserted full into the back cover.
Step 9: Precision Opening Technique:

- Move the opening pick all along the right edge until all the adhesive has become loose.
- Leave the opening pick into the gap between the frame and the cover near the top of your Samsung Galaxy S20.
- There are chances of other picks to become loose, if it happens then move the picks aside so the edges cannot reseal.
- Apply force on the opening picks to the extent as it cannot damage the frame.
Step 10: Separate the Top Edge Adhesive

- In this step heat the iOpener or a heat gun at low heat setting and then apply to the top edge of your smartphone back cover.
- When the adhesives become loose, then slide the opening pick from the right edge towards the top side.
- Continue sliding the pick all along the top edge then move towards the left edge so that it can fully separate the adhesives of the back cover.
- During the sliding if you find any difficulty at any point then apply the heat again to lose the adhesives.
- At the end of this step all the back cover adhesives will become loose.
Step11: Remove the Back Cover

- Slide the opening pick all around the edges of your smartphone to slice any remaining adhesive.
- Now the cover has been separated from the frame and lifted slowly.
- Remove the back cover.
- Keep in mind that the back cover houses the battery and gives access to various internal components of your smartphone so lift it carefully.
Step 12: Unfasten the Motherboard Bracket

- When you have removed the back cover then identify the motherboard bracket.
- With the help of appropriate Phillips #00 screwdriver, remove the motherboard bracket screws.
- Keep track of all the screws so you can easily find them during reassembly.
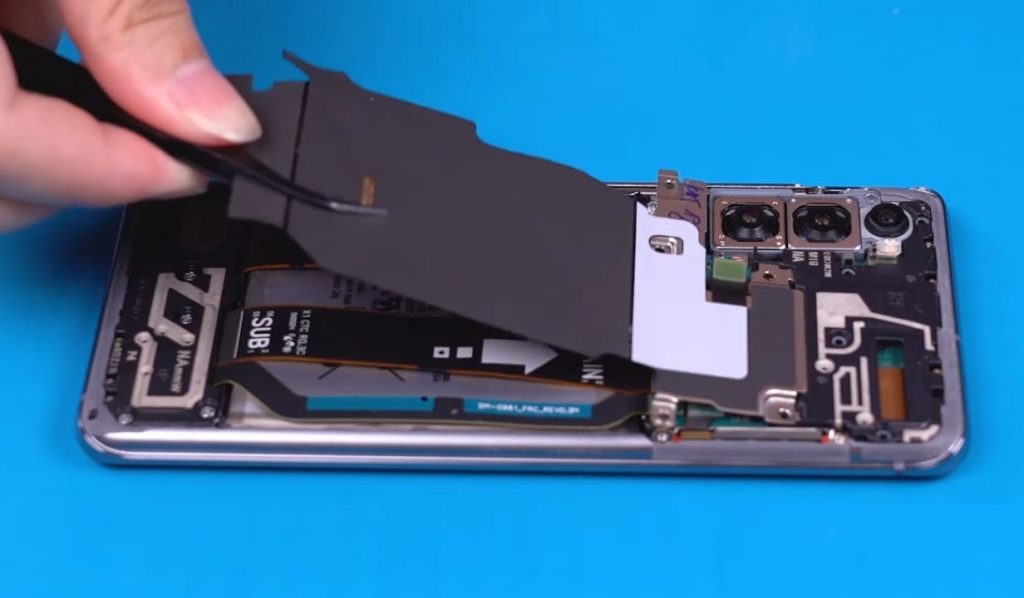
Step 13: Unclip the Motherboard Bracket

- When all the screws have been removed then lift away the motherboard bracket carefully with the help of a pair of tweezers.
- Don’t loft it completely as it is still attached to a wireless charging coil.
Step 14: Remove the Wireless Charging Coil

- To remove the wireless charging coil, power off the device completely to prevent any electrical damage.
- Then with the help of the heat gun heat up the area around the coil to lose the adhesives securing it.
- Then remove the charging coil with the help of finger tips or tweezers.
- Note that the coil is still attached to the device with the help of spring contacts.
Step 15: Disconnect the Battery

- Disconnect the battery connector from its socket with the help of spudger.
- Do it carefully as it may damage nearby components.
- Ensure that the spudger is inserted carefully below the connector to prevent damaging it.
- Do not use much force to disconnect the battery to prevent any damage to the motherboard.
- In this way you can safely disconnect the battery connectors.
Step 16: Remove the Loudspeaker

- Locate the lower midframe and loudspeaker in your device assembly.
- Use a Phillips #00 screwdriver to open the 4mm long five screws securing the loudspeaker and the lower midframe.
- Apply a certain amount of pressure to the spudger to avoid slipping and causing any damage to nearby components.
- When all the screws are removed then insert a pair of tweezers into the top left corner of the midframe and release the clips.
- At the end remove the loudspeaker and the midframe.
- Keep both of them in a safe place to avoid any potential damage.
Step 17: Disconnect the Display Cable

- Before you really go forward, with the help of a spudger disconnect the display cable carefully to avoid any damage.
- In the upcoming various steps heat the black adhesive around the perimeter of the device and separate it.
- Insert the opening pick upto 5mm into the adhesive surrounding the device’s long edges.
It’s necessary to note that along the top edge of your smartphone, the adhesive extends farther away from the edge so insert the opening pick deeper to separate the adhesives completely but be careful not to damage the internal component.
Step 18: Separate the Perimeter Adhesive

- Heat the iOpener or a heat gun and apply it to the top edge of the screen for almost two minutes to effectively remove the perimeter adhesive.
- Do not overheat the heat gun or iOpener as it may damage the battery or other internal delicate components.
- Apply a suction cup to the display glass, positioning it as close to the center of the top edge as possible.
- If the display is extensively cracked, consider covering it with clear packing tape to facilitate suction cup adhesion. Alternatively, utilize strong tape or consider supergluing the suction cup to the broken screen if necessary.
- Apply strong, steady force to the suction cup to create a gap between the display glass and the frame.
- Insert the point of an opening pick into the gap at the center of the earpiece speaker notch, ensuring it moves downward underneath the display while avoiding contact with the front-facing camera.
- Reheating with the iOpener and using the suction cup may be required multiple times due to stubborn adhesive.
- To prevent resealing of the adhesive, leave the pick in the seam once it’s inserted.
Step 19: Seam Protection Technique

- Place another pick into the identical gap and glide it towards the upper left corner of the display to cut through the adhesive.
- Keep the initial pick in the crevice to stop the adhesive from sealing again.
- After that insert a third pick into the central gap and slide it toward the top right corner of the display to cut through the adhesive.
- Ensure your pick remains in the seam to prevent the adhesive from sealing back together.
Step 20: Cautionary Pick Extraction

- Extend the center pick deeper into the top edge of the device to cut through the adhesive encircling the earpiece and front-facing camera.
- If the adhesive proves stubborn, increase the heat application and attempt separation once more.
- Exercise caution not to insert the pick excessively, as this may cause it to become misplaced beneath the screen assembly.
- Finally, withdraw the center pick from the device.
Step 21:Display Prepping

- Begin by using a heated iOpener to warm the right edge of the display for a duration of two minutes.
- Subsequently, insert an additional pick into the gap situated at the top right corner of the display.
- Carefully maneuver the pick downward to the bottom right corner to effectively slice through the adhesive.
- Finally, insert another pick underneath the center of the screen’s right edge to maintain separation and prevent the adhesive from resealing.
Step 22: Display Opening Procedure

- Heat the iOpener and apply it to the left edge of the display for a duration of two minutes.
- Insert a pick into the gap located at the top left corner of the display.
- Gently slide the pick downwards to the bottom left corner, effectively slicing through the adhesive along the way.
- Place another pick beneath the center of the screen’s left edge to prevent the adhesive from sealing again.
Step 23: Separate the interior adhesive

- During this step, utilize isopropyl alcohol to loosen the clear adhesive located towards the bottom center of the device’s screen.
- Apply isopropyl alcohol with a concentration exceeding 90% behind the display, aiming as close to the marked red clear adhesive as feasible.
- While applying the alcohol, tilt the device to assist in its penetration beneath the lower section of the display adhesive.
- Subsequently, continue tilting the bottom of the phone downwards for approximately two to three minutes to facilitate further penetration of the alcohol.
Step 24: Precision Separation

- Carefully slide a spudger beneath the top edge of the screen to gently separate the transparent adhesive.
- Continue inserting the spudger until the clear adhesive is fully detached from the screen.
Step 25: Remove the screen

- Detach the display from the frame.
- You may find a narrow strip of adhesive remaining at the bottom edge of the phone, which should detach without difficulty.
- Ensure the display cable is carefully threaded through the frame.
- Avoid inserting the display cable until the new screen adhesive is applied.
Step 26: Remove the Old Adhesive

- Utilize tweezers to eliminate any residual adhesive adhered to the frame.
- To prepare the frame for new adhesive, employ isopropyl alcohol along with a lint-free cloth to meticulously cleanse the surface. Ensure to wipe in a single direction to prevent smudging.
Step 27: Installing the New Screen

- Once all the flex cables are disconnected, carefully remove the old screen from the device and set it aside.
- Take the replacement screen and position it correctly, aligning it with the screw holes and the flex cable connectors.
- Gently reconnect the flex cables to their respective connectors, ensuring they are securely fastened.
- Once the flex cables are properly connected, carefully lower the replacement screen onto the device’s frame, aligning it with the edges and ensuring a snug fit.
- Apply gentle pressure to the edges of the screen to ensure it is properly seated and secured to the device’s frame.
Step 28: Power On Testing the New Screen

After successfully replacing the screen of your Samsung Galaxy S20, it is crucial to ensure that the new screen functions properly.
- Power on the device
- Touch sensitivity test
- Check for color accuracy
- Test screen brightness
- Inspect for pixel issues
- Test screen rotation
- Check for screen alignment
- Test the proximity sensor
- Verify the ambient light sensor
- Perform a comprehensive functionality test
Conclusion:
In conclusion, undertaking a Samsung Galaxy S20 screen replacement can be a challenging task, but with the right tools, knowledge, and patience, it can be successfully accomplished.
Throughout this comprehensive guide, we have provided you with step-by-step instructions to ensure a smooth and effective screen replacement process. By following these instructions carefully, you can avoid common pitfalls and achieve a professional result.