
Are you frustrated with the disappointingly short battery life of your Samsung Galaxy S22 Ultra? Look no further! Our tutorial on Galaxy S22 Ultra battery replacement is here to help. If your phone’s battery no longer holds a charge like it once did, it’s time to make an upgrade.
We’ll show you how to easily replace the battery in your Samsung Galaxy S22 Ultra 5G with our step-by-step guide. By following these steps, you’ll have access to a world of extended battery life and improved performance for your smartphone.
Required Tools and Materials
Before we begin, make it sure that you have the required tools and materials readily available:
- Replacement battery for Samsung Galaxy S22 Ultra
- Phillips screwdriver
- Spudger or plastic opening tool
- Tweezers
- Adhesive strips or double-sided adhesive tape
- Heat gun or hair dryer
- Clean cloth or microfiber cloth
- Safety goggles and gloves (optional but recommended)
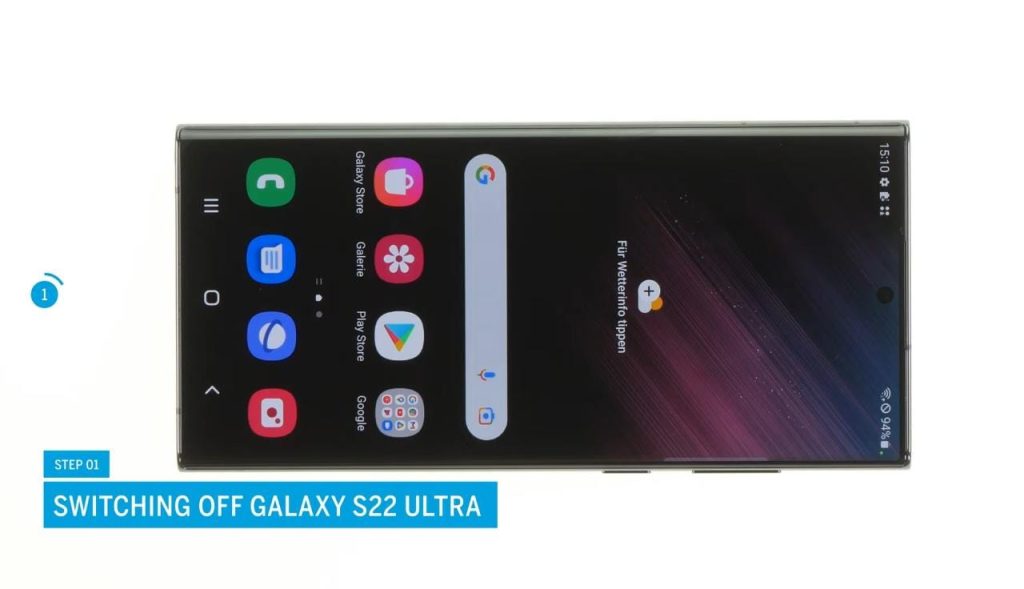
Step 1: Power Off Your Phone
Turn off your device to start the battery replacement process. Locate the SIM card tray on the phone’s side and remove it using a SIM card ejector tool or a paperclip. Place your SIM card tray somewhere safe.
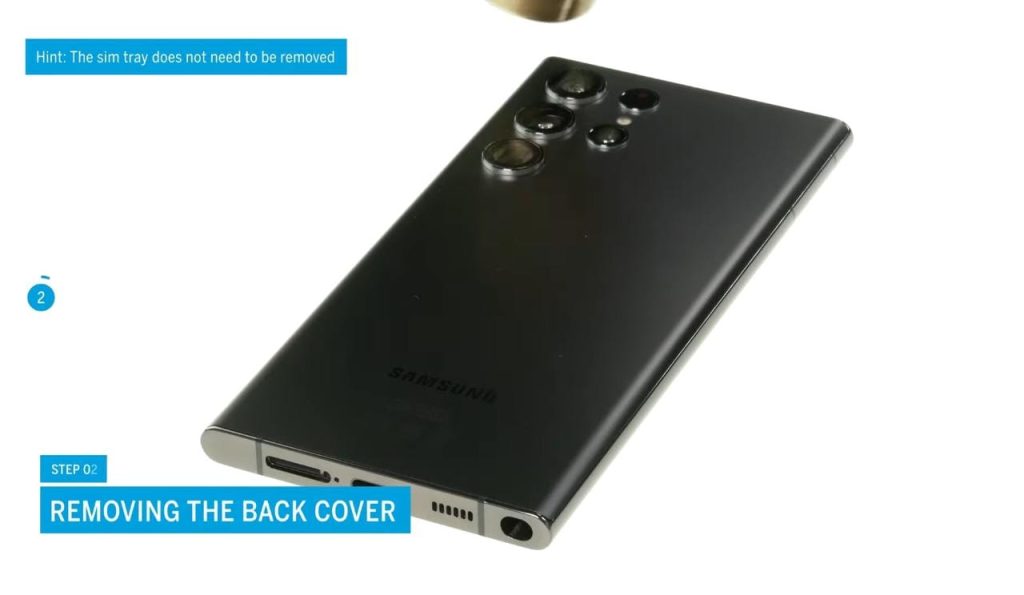
Step 2: Remove the Back Cover
Warm up the back cover of your Galaxy S22 Ultra with a heat gun or hair dryer. This softens the material that holds the back cover in place. Make sure not to overheat the phone. When the back cover is warm to the touch, gently pull it off using a plastic opening tool or spudger. To commence, start at a single corner and proceed along the edges to detach the back cover from the rest of the phone’s body.
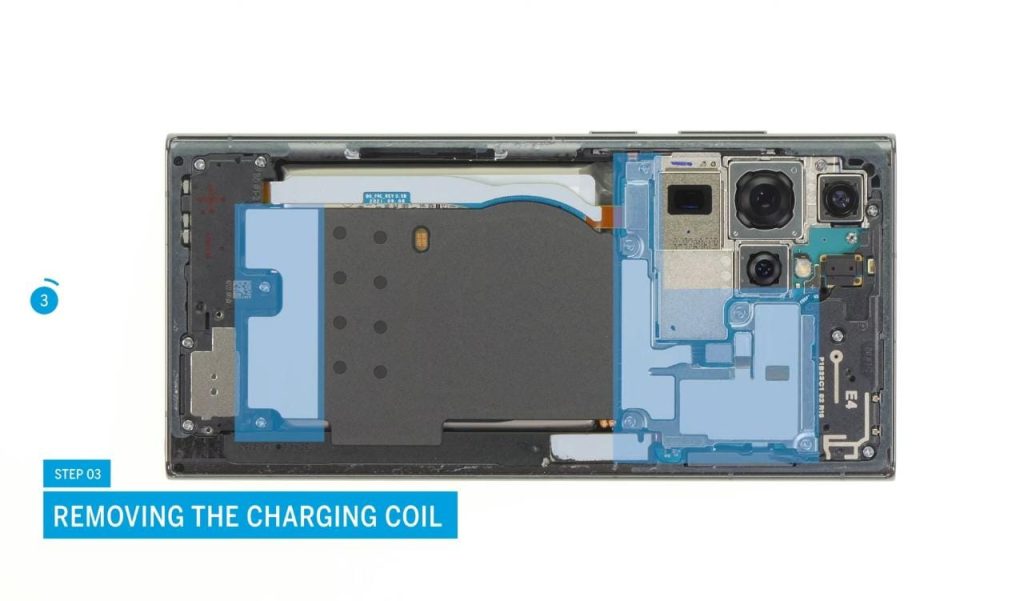
Step 3: Removing the Charging Coil
You are ready to remove the charging coil from your Samsung Galaxy S22 Ultra after successfully removing the back cover. Take the following steps:
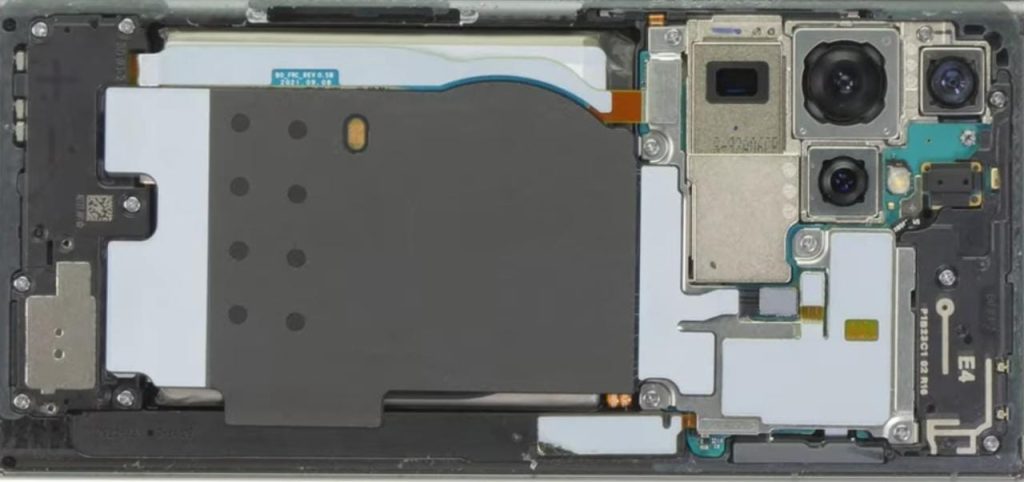
- Locate the charging coil: Typically, you can locate the charging coil near the center of the device’s back panel, below a protective metal plate.
- Disconnect the connector: Remove the connector that connects the charging coil to the device’s motherboard with care.
- Lift and remove the charging coil: Once you disconnect the connector, lift the charging coil from its location.
- Clean the area: Wipe away any dust or dirt with a clean cloth or a microfiber cloth.
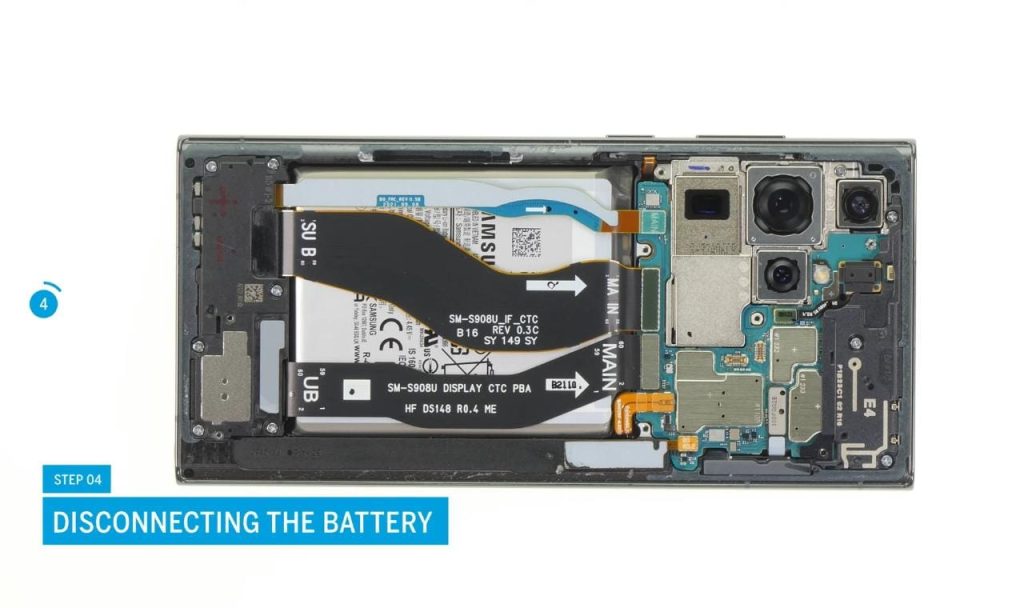
Step 4: Disconnecting the Battery
After you’ve successfully removed the charging coil, look for the battery connector, which is near the bottom of the phone. Lift the connector gently with tweezers and detach it from the motherboard. To avoid any harm, be cautious and avoid exerting excessive force.
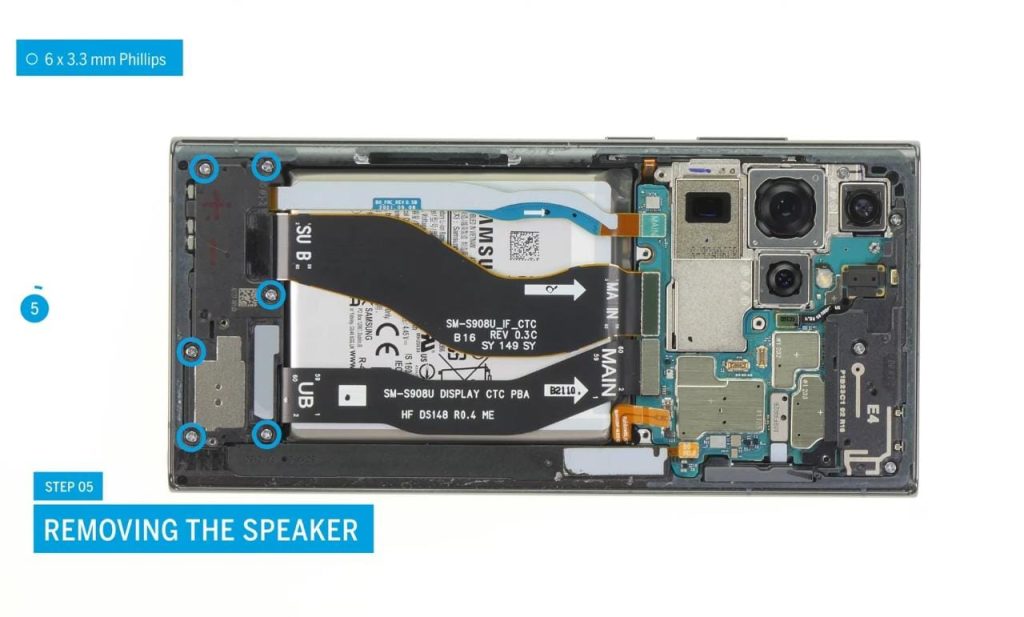
Step 5: Removing the Speaker
After disconnecting the battery, you can proceed with removing the speaker from your device. Follow these steps:
- Locate the speaker: The speaker is positioned near the bottom of the phone, situated next to the charging port or microphone.
- Disconnect the speaker connector: Carefully inspect the speaker and locate the connector that attaches it to the device’s motherboard. With the aid of tweezers, carefully elevate the connector and detach it from the motherboard. Exercise caution and avoid applying excessive force to prevent any damage.
- Lift and remove the speaker: Raise the speaker from its current placement by gradually and uniformly lifting it until it is entirely dislodged from the device.
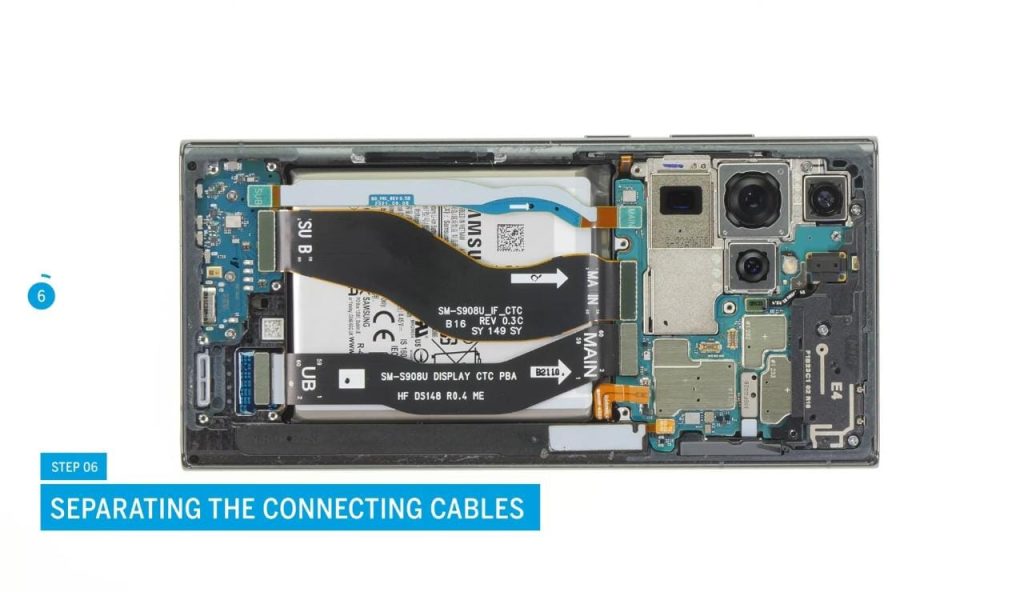
Step 6: Separating the Connecting Cables
Now that the battery has been disconnected, and the speaker has been removed, we can move on to separating the connecting cables. Assess the cable connections and note the specific type of connectors used for each cable. Depending on the type of connector, use the appropriate tools, like tweezers or a small screwdriver, to carefully disconnect the cables. Gently lift any clips, release tabs, or undo screws to loosen the connectors.
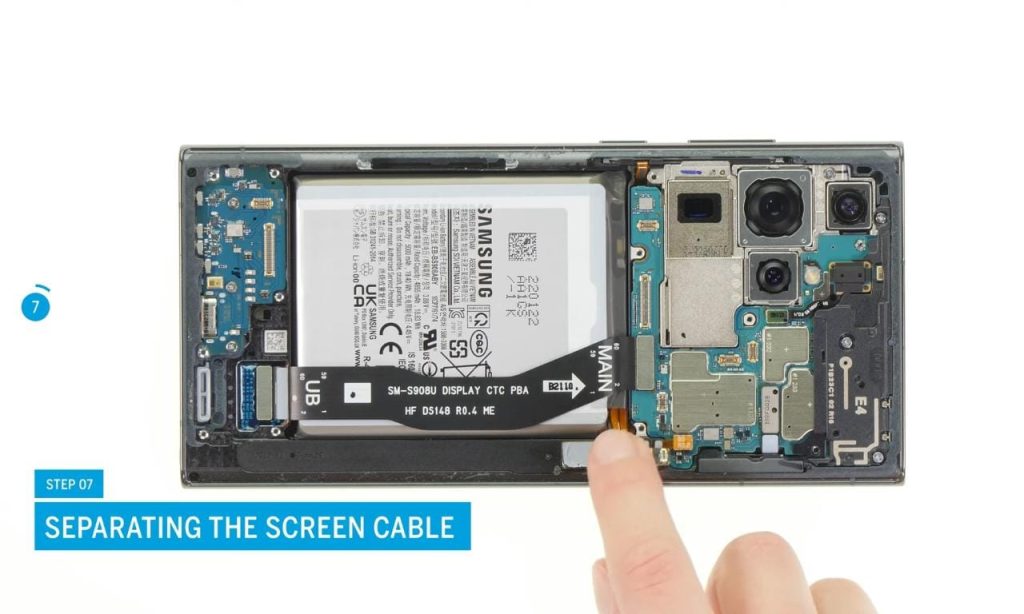
Step 7: Separating the Screen Cable
Screen cable is positioned near the top of the device. It connects the display assembly to the motherboard or display controller. Examine how the screen cable is connected. Take note of the connector type and any locking mechanisms present. Use tweezers, a plastic spudger or a small screwdriver to perform the disconnection.
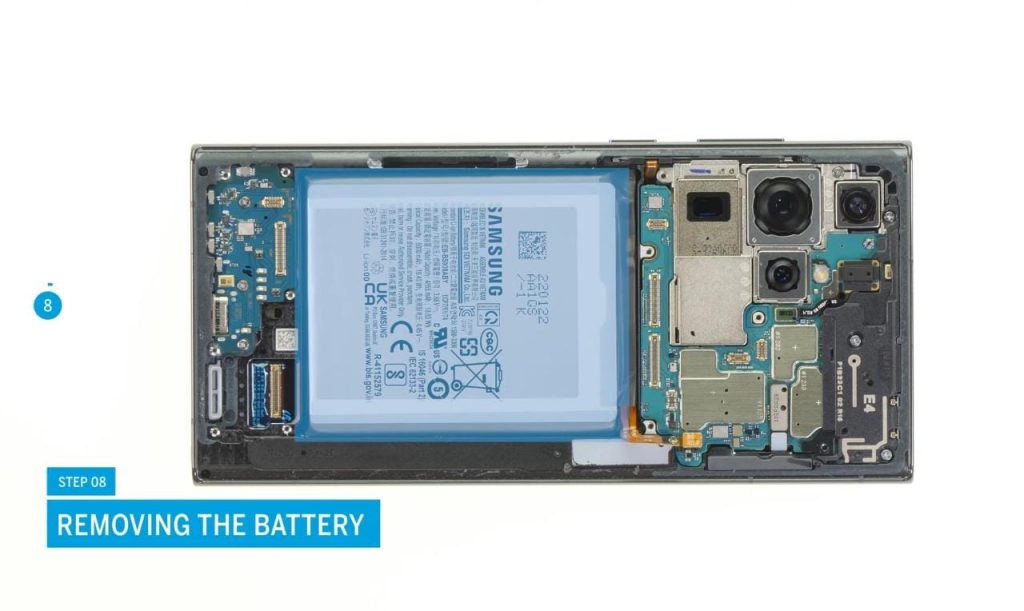
Step 8: Removing the Old Battery
Once the screen cable is disconnected, you can now safely remove the old battery. Look for any adhesive strips or double-sided adhesive tape securing the battery in place. Carefully peel off or lift these adhesive strips to release the battery. Take your time to avoid bending or damaging the battery during removal.
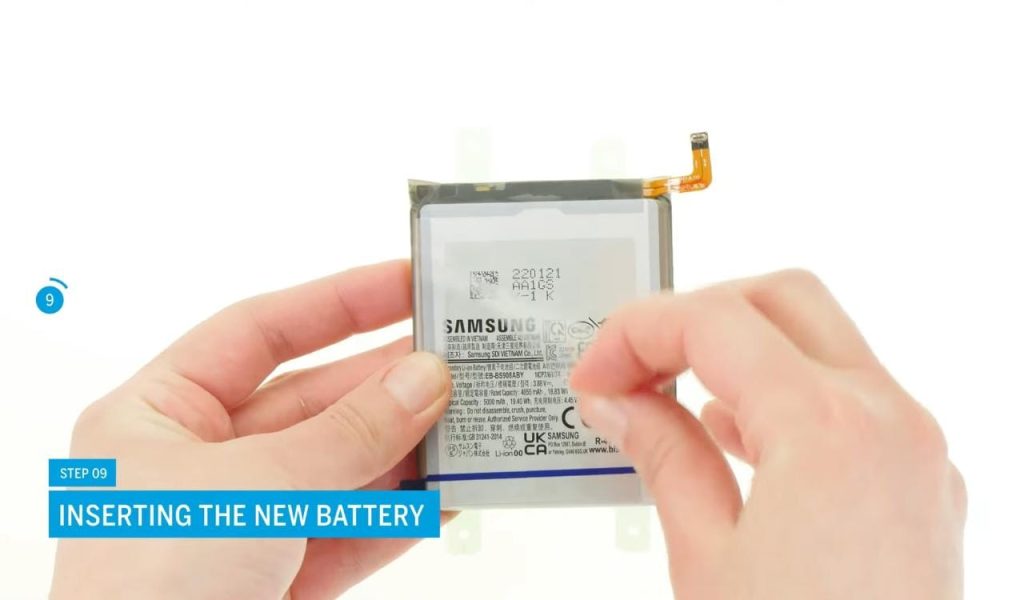
Step 9: Inserting the New Battery
Take the replacement battery for your Samsung Galaxy S22 Ultra and position it correctly in the battery compartment. Ensure that the battery’s connectors align with the corresponding slots on the motherboard. Carefully apply gentle pressure to firmly secure the battery in its position.
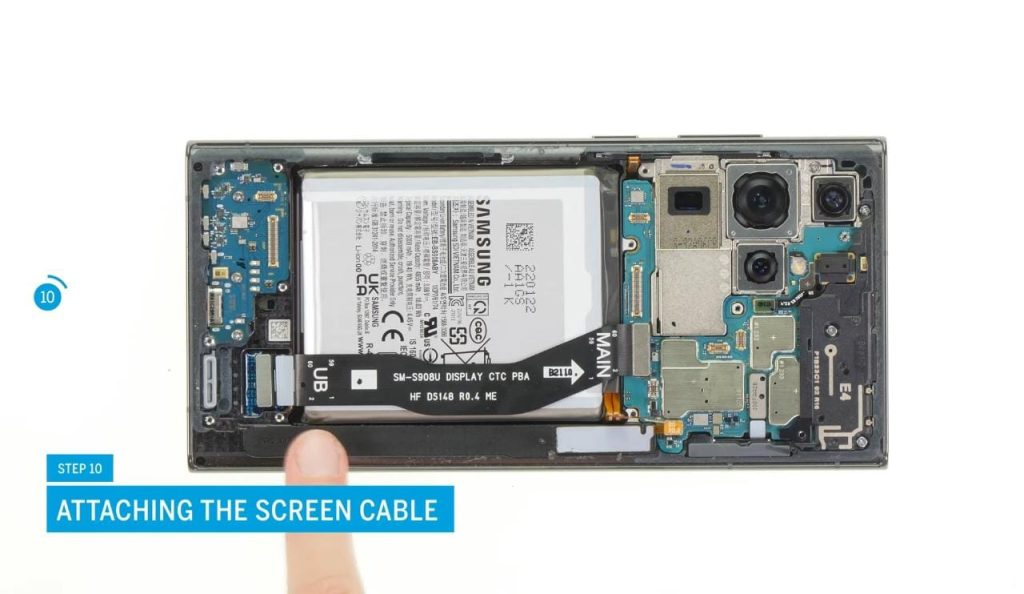
Step 10: Attaching the Screen Cable
Carefully locate the screen cable connector on the motherboard of your phone. Align the cable’s contacts with the corresponding pins on the connector and firmly attach it, ensuring a secure and reliable connection.
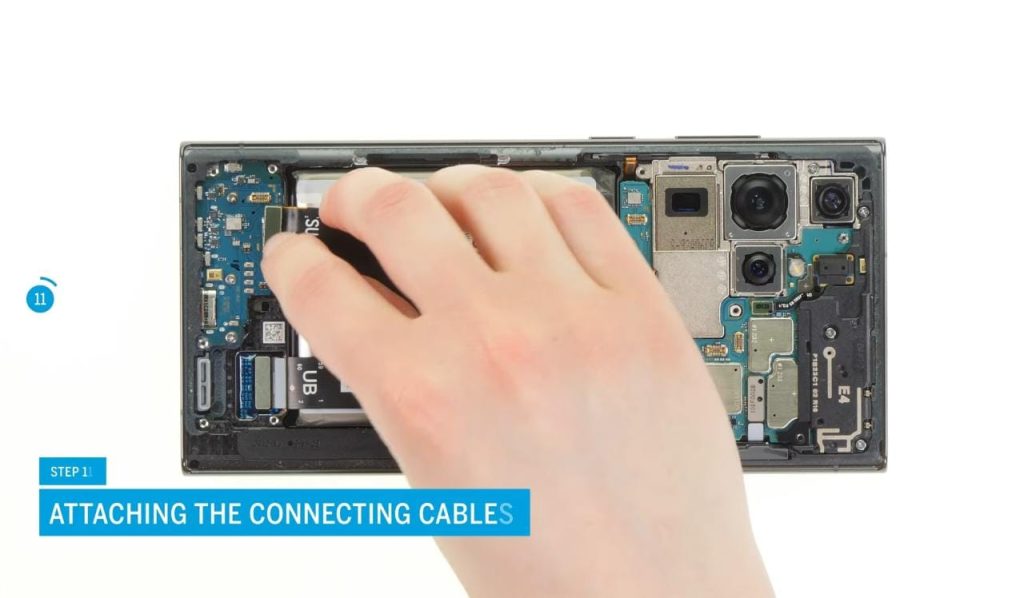
Step 11: Attaching the Connecting Cables
Now align each cable with its corresponding port on the motherboard, ensuring a snug fit. Gently press each cable into place, securing a reliable connection for optimal functionality.
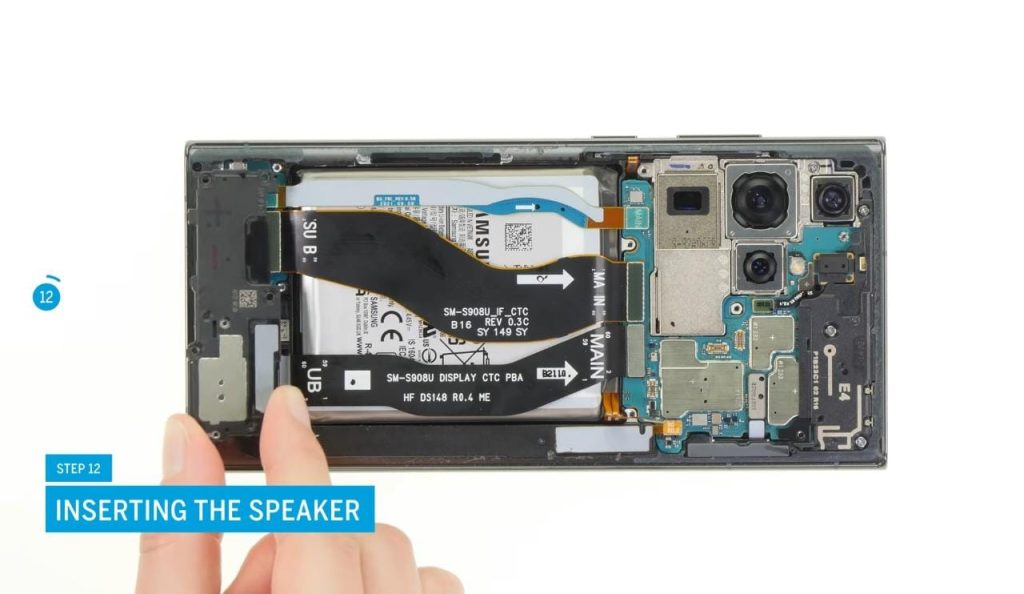
Step 12: Inserting the Speaker
To proceed with inserting the speaker into your Samsung Galaxy S22 Ultra, position it correctly within its designated slot. Align the speaker’s connectors with the corresponding ports on the motherboard. Apply gentle pressure to ensure a secure and snug fit, allowing for optimal audio performance.
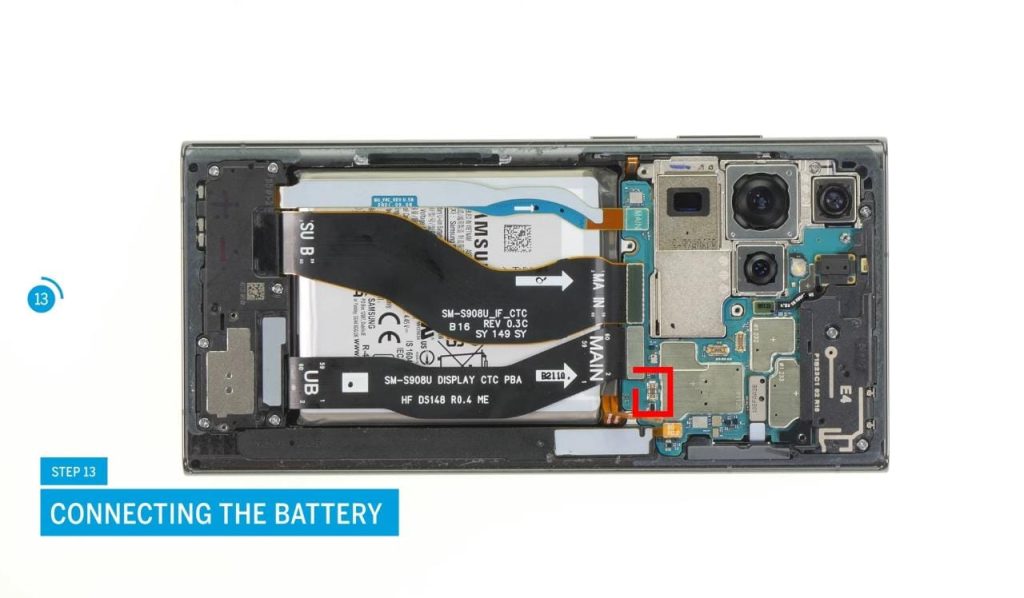
Step 13: Connecting the Battery
To connect the battery of your Samsung Galaxy S22 Ultra, locate the battery connector on the motherboard. Align the connectors of the battery with the corresponding ports on the motherboard. Carefully insert the battery connector into place, ensuring a firm and secure connection.
Step 14: Inserting the Charging Coil
For the next step, carefully position the charging coil in the designated area of your device. Ensure proper alignment with the corresponding slots on the motherboard. Gently press the charging coil into place, securing it firmly for efficient wireless charging functionality.
Step 15: Power On
Finally, insert the SIM card tray back into its slot on the side of the phone. Make sure it’s properly seated. Now you can power on your smartphone and enjoy your newly replaced battery. You should notice improved battery life and performance from your device.
Conclusion
Congratulations on successfully replacing the battery in your Samsung Galaxy S22 Ultra. By following this tutorial, you have taken a crucial step towards restoring your phone’s battery life and overall functionality. Remember to handle all the components with care and take your time during each step of the process. If you face any difficulties or are unsure about any specific step, it’s always recommended to seek professional assistance or reach out to Samsung’s customer support.
With a new battery, your Samsung Galaxy S22 Ultra will be ready to accompany you throughout your day, providing reliable power for your daily tasks, communication, and entertainment needs.
FAQs (Frequently Asked Questions)
-
How frequently should I replace the battery in my Samsung Galaxy S22 Ultra?
On average, smartphone batteries start to degrade after about 2–3 years of use. If you observe a notable decrease in battery life or your phone struggles to hold a charge, it may be time to consider replacing the battery.
-
Where can I purchase a replacement battery for my Samsung Galaxy S22 Ultra?
You can purchase a replacement battery from authorized Samsung service centers, reputable online retailers, or third-party suppliers specializing in phone parts and accessories.
-
Do I need any particular tools to replace the battery?
Yes, you will need a Phillips screwdriver, a spudger or plastic opening tool, tweezers, adhesive strips or double-sided adhesive tape, and a heat gun or hair dryer for this battery replacement process.
-
Can I replace the battery myself, or should I seek professional help?
The battery replacement process can be done by individuals with some technical skills and experience in handling electronic devices. However, if you are not confident or comfortable performing the replacement yourself, it’s advisable to seek professional assistance to avoid any accidental damage but the professional replacement of Samsung Galaxy S22 Ultra Battery will cost high.
-
Will replacing the battery void my Samsung warranty?
Replacing the battery yourself or having it replaced by a non-authorized service provider generally voids the warranty. To maintain warranty coverage, it is advisable to have an authorized Samsung service center perform the battery replacement.
Remember, always prioritize your safety and follow the instructions carefully when working with electronic devices. If you’re unsure about any step or encounter any difficulties, consult a professional. Enjoy your revitalized Samsung Galaxy S22 Ultra with its newly replaced battery.

